Category: Blog
I read quite a bit of material online. I save "bookmarks" of all of it on my personal website, sometimes with some additional notes and sometimes even with more explicit annotations. One of
First day of #IndieWeb Summit, scattered notes that I take as they come. Hopefully I don't end up misrepresenting things too badly.
Motivate by yesterday’s discovery/follow session, which I didn’t attend but fortunately had detailed notes: https://etherpad.indieweb.org/follow
Yarns Microsub Server: Getting started guide
Yarns is a Microsub server that runs on your WordPress site. This means it can help you follow feeds from blogs, websites, and social media all in place, running on your own server.
You tell Yarns which feeds you want to follow, and it will collect new posts in the background. It can understand feeds in several different formats (Microformats, RSS, Atom, JSONFeed).
Rather than viewing posts in Yarns itself, you can view and interact with your timeline a Microsub client, such as Indigenous, Monocle, Together or others.
If your site supports Micropub, then you can respond to your timeline in any of those client apps, and your responses will be posted on your own website. See below for more details about this.
Accompanied by other plugins that support IndieWeb standards, Yarns can help use your personal website as the centre of your online identity.
Installation
Requirements
Yarns is part of the IndieWeb ecosystem, and requires a few parts to get things working.
The easiest way to get started is to install the IndieWeb plugin, with the following extensions:
- IndieAuth: To log into a Microsub client.
- Micropub: (optional) To post to your site from a Microsub client.
- IndieWeb Post Kinds: (optional) To be able to post likes, replies, and other types of responses to your feeds.
** Note, if you have IndieWeb Post Kinds installed, you’ll need to upgrade to at least version 3.3.1 for Yarns to work.
How to install
To install Yarns, download the latest release from its Github repository.
Then install in WordPress by going to Plugins->Add New->Upload Plugin, and selecting the .zip you just downloaded.
Finally, click ‘activate’ when prompted.
First steps
Once you’ve installed Yarns, a page called “Yarns Microsub Server” will be accessible in your WordPress dashboard.
If you have the IndieWeb plugin installed, this page is linked under the “IndieWeb” menu.
If you don’t have the IndieWeb plugin installed, this page can be found in the “Settings” menu.
Either way, navigate to “Yarns Microsub Server”, and you’ll see something like this:
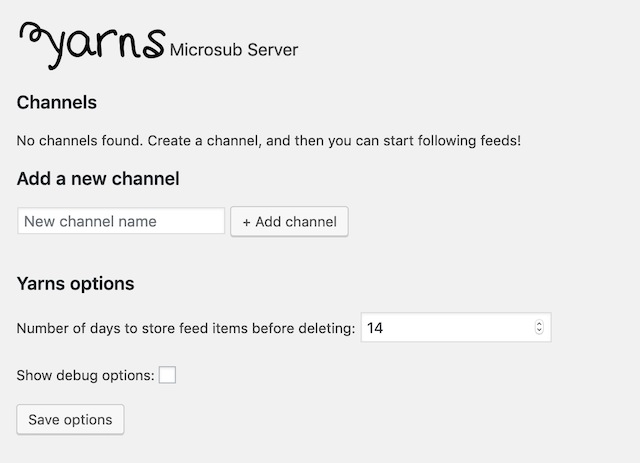
Creating channels
When you subscribe to feeds in Yarns, they are organized into channels. For example, I keep have channels for News, Sports, IndieWeb, and others.
So the first thing you’ll want to do is create a new channel in which you can start to follow some feeds.
To do so, complete the section labelled “Add a new channel” from the “Yarns Microsub Server” page in your WordPress dashboard:

You can name a channel whatever you like, and you can change the name later.
Tip: If you want to be fancy, I recommend adding emojis as icons (e.g. “📰 News”). You can copy and paste emojis from a site like emojipedia.
Following feeds
Once you’ve created a channel, you can follow feeds inside it. First, click on the channel name from the Yarns page in your WordPress dashboard:

You’ll see an option to “Follow a new site.” Enter the address for a website you want to follow, click ‘Search,’ and Yarns will attempt to find feeds it can follow.

If it finds feeds on that website, Yarns will display them as a list.
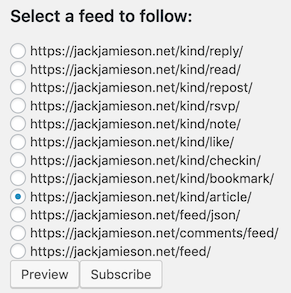
Some sites (like mine) have a lot of feeds. To help you choose which feed to subscribe to, you can click ‘preview’ and Yarns will show you a quick snapshot of the most recent posts in that feed.
When you’re ready, click ‘Subscribe’ and the feed will be added to this channel.

From now on, Yarns will regularly check to see if there are new posts from this feed. If so, they’ll be saved for you to view at your convenience.
** Note: Some Microsub clients, like Together, will let you manage channels and feeds within the client.
Feed items are only stored temporarily
Items from your feeds, such as articles, notes, or other types of posts, are saved in a database on your own site.
Feed items are only stored for a limited time (14 days by default). And, when you first add a feed, it’s contents will only be added if they were published within that time limit. If you want to edit the storage period, you can do so under “Yarns options”:

** Technical note: Yarns’ feed items are currently stored as a custom post type in the WP_Posts table of your WordPress site. There are plans to change this, as noted on Yarns’ GitHub.
Viewing feeds
To view your feeds, you’ll need to use a Microsub client such as
These clients require you to log in using IndieAuth. On WordPress, the easiest way to do this is by adding the IndieAuth plugin.
Once you have IndieAuth working, you can use any of the clients linked above to view your feeds. Simply log into a client using your website’s domain name, and you’ll see your channel(s) and items from the feeds you added.
For example, here is how my feeds are displayed using Monocle:
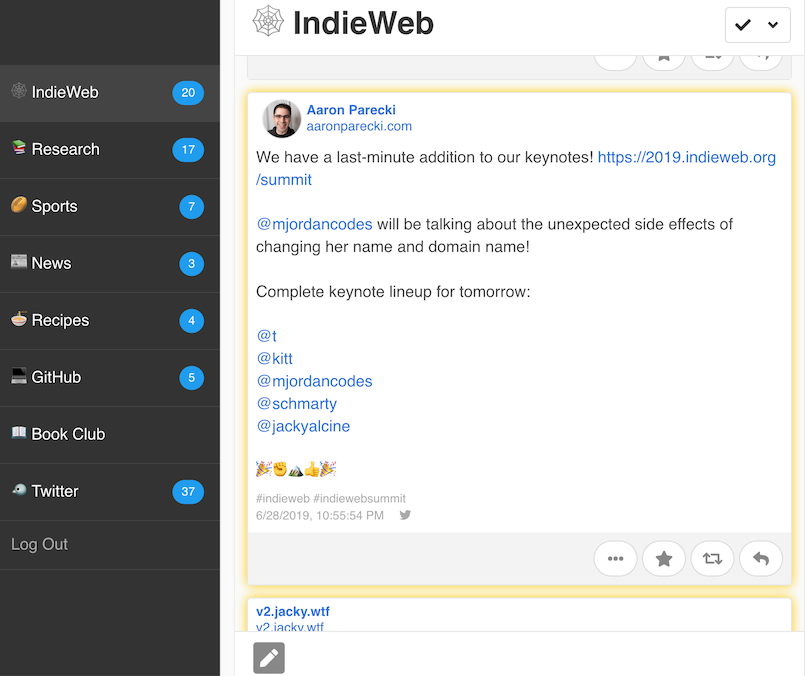
Replying to feeds
Microsub clients typically allow you to respond to feed items, just like you might do on timelines in Facebook, Twitter, or other social media platforms.
This is as easy as clicking the response options provided by the client. This sends instructions to your site to create a post.
If you want this feature to work, you’ll need to install the Micropub plugin. This is because Microsub clients use the Micropub protocol to instruct your site to make a new post.
Additionally, I recommend using the Post Kinds plugin, which makes it easy to define posts as replies, likes, reposts etc.
Customizing channels
Channel order
You can change the order of your channels by dragging-and-dropping them:
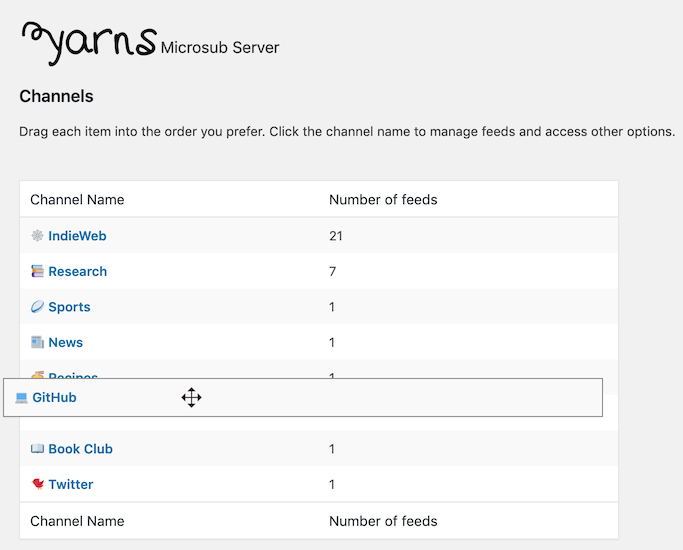
Channel settings
To access settings for each channel, navigate to that channel, then click “Channel settings”:
![]()
Yarns will display something like the following: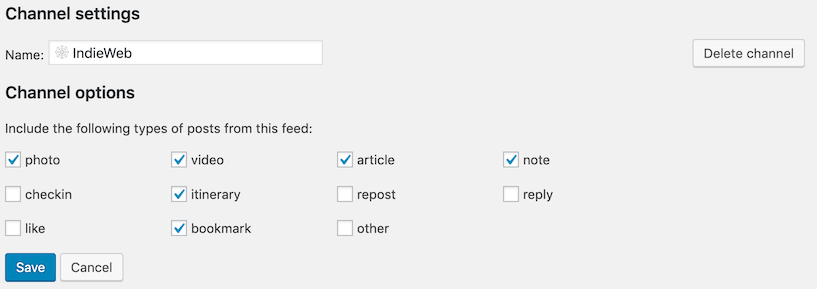
Rename a channel
To rename a channel, simply edit its “Name” field and click save.
Delete a channel
If you want to delete the channel altogether, click ‘Delete channel’ from its settings page.
Filter feed items by post type
You can control what kinds of posts will be saved to each channel. For example, if the sites you follow post a lot of post types which don’t interest you, then you can uncheck those types here.
Following social media platforms
You can even use Yarns to follow your timelines from sites like Twitter. The easiest way to do this is with a service like Granary. Neil Mather has posted a nice guide about this.
Debug options
There are a few debug options available in Yarns. Ideally you shouldn’t need these, but you can enable them by checking the “Show debug options” box:
![]()
Debug log
The debug log is a record of recent requests/responses between your Microsub client and Yarns’ API endpoint. I use this for troubleshooting. If you find any bugs with Yarns, you might find it useful to report an issue to Yarns’ Github, including a copy of your debug log.
Delete all posts
This button will delete all posts (feed items) in your Yarns channels.
Force poll
This button will poll all channels for new posts, bypassing Yarns’ polling schedule. This can take some time to complete, so please be patient!
Going to list up how I got to join the #indieweb - pecha kucha style* - ish... - presentation to follow 🤞2017 - Got fed up with ad-revenue supported social media silos being commercially exploited and digitally tracked and followed. 2017 / 2018 - Tested Mastodon, but getting overwhelmed by an ove...
An Open Source collection of Design Principles and methods